This is a problem I faced for a long time and I didn’t know how to fix or overcome it. The problem is after you create your logo or vector in Adobe Illustrator, and you want to scale the whole vector down or up.
It’s would be very straightforward, right? grab it and scale…Wrong!
If you try to scale it as is the strokes or corners you have applied do not scale proportionally, this means your logo will have an oversized stroke and corner raduis when you shrink it down!
But there is a way to fix this, a secret hidden way let me show you how in this easy 5-step method.
Check out this article Adobe Photoshop vs Illustrator
How to Proportionally Scale Your Strokes in Adobe Illustrator
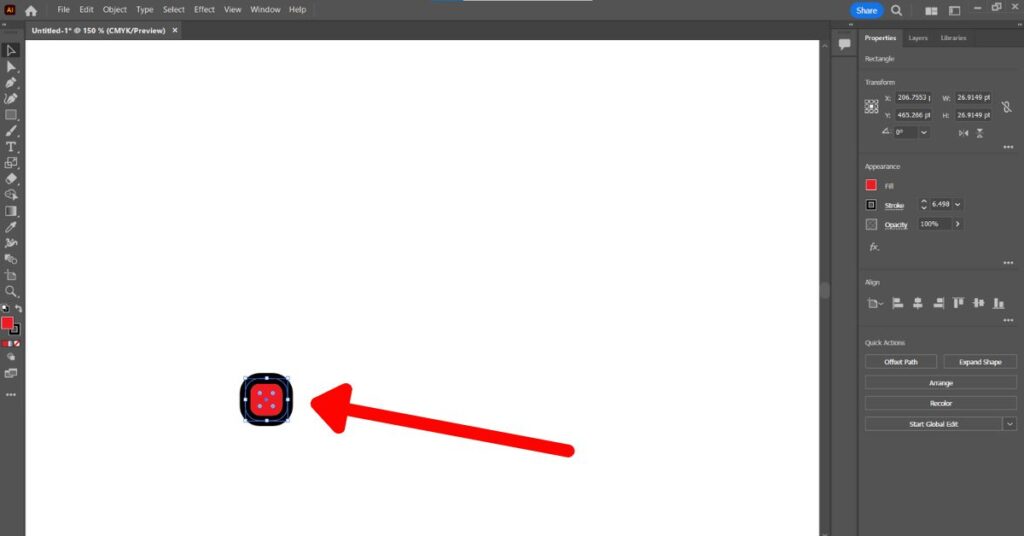
Alright first let’s examine the problem visually, below is a simple square with a stroke applied to it, notice how thick the stroke is.

As we scale it down notice how the stroke size remains the same identically to what it used to be and is not affected by the scaling we applied on the whole square vector.

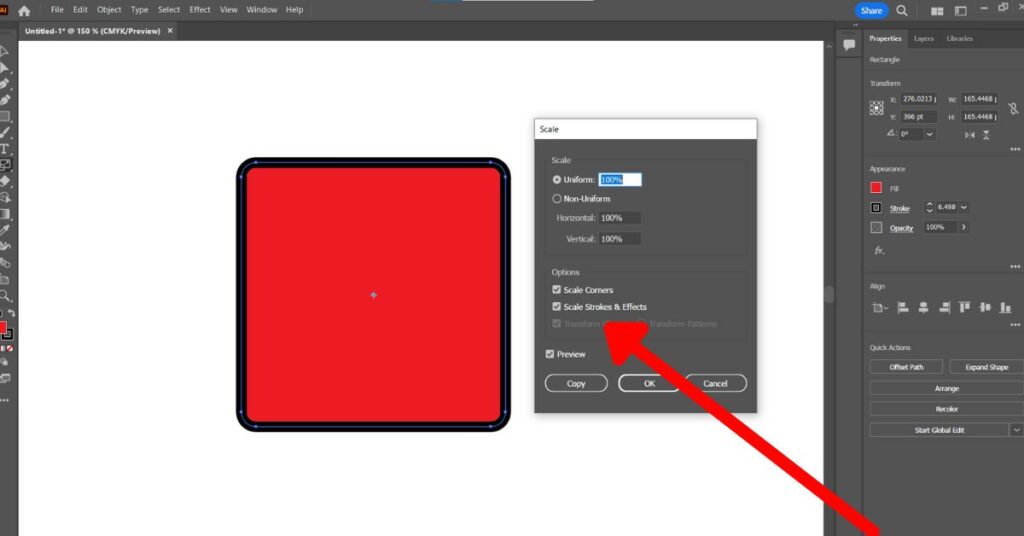
- Step 1: Click and hold the rotate tool, it will expand and you will see hidden under it the “Scale Tool” (told you it was hidden)

- Step 2: A new window will open with more settings for the scale tool, under the “Options” section, Check “Scale Corners” and “Scale Strokes & Effects”

- Step 3: Now try Scaling the square and you will see that the round corners and the strokes get scaled along with your square!

and that’s it you don’t have to re-enable that option every time, you do it once and you forget about it.
Quite hidden wasn’t it, I hope this quick tip would help you with your design tasks and work.
Check out this tutorial to learn more about the powerful Live Paint Bucket Tool in Adobe Illustrator.